Tag Archives: vegan

Recipe: Chickpea and Spinach Curry

You may have noticed a trend here. I really like curry! They can be quick to make, they taste even better the next day, and you can make multiple servings really easily. I’m all about ease in the kitchen. This is a recipe I tasted when I was assisting a Food as Medicine Conference at Kripalu, in the Berkshires in Massachusetts. Kripalu is a beautiful retreat center, and the food is amazing. And I’m not just saying that because it’s nice to not have to cook for a few days! Though that is true, too. They have so much great food to choose from, they always have vegan, veggie and gluten free options (and meat and a sandwich bar. See? Everyone is covered!).

This curry is thick and creamy with protein from the chickpeas and greens in the form of spinach (but you know you can sub the spinach for any other type of green – these recipes are all so forgiving and easy to adapt for what you have on hand). While fresh spinach is best in this recipe, if you only had frozen, it would be fine.

If you haven’t checked out my posts on meal planning, please do so! But, here’s a freebie – keep a stocked pantry! You could easily make this recipe on a weeknight without stopping at the grocery store if your pantry is well stocked.

Chickpea and Spinach Curry

Ingredients:

2 tbs coconut oil
1 onion, minced
2 cloves garlic, minced
1 inch ginger, minced
1 tsp cumin
1 tsp coriander
1 tsp chili powder
2 tsp garam masala
1.5 tbs tomato paste
2 cans chickpeas
1 can full fat coconut milk
4 cups spinach
salt and pepper to taste

Procedure:
1. Heat oil in a wide pan. Add onions and a pinch of salt. Saute until translucent, about 3 minutes.
2. Add ginger and garlic to pan. Saute 1-2 minutes, until fragrant.
3. Add tomato paste and spices. Cook 2-3 minutes.
4. Add chickpeas and coconut milk. Stir until well mixed. Bring to a boil and then reduce heat to a simmer. Cook until heated through, about 5 minutes.
5. Add spinach and cook until wilted.
6. Adjust salt. Add a squeeze of lemon juice if you like.
Garnish with cilantro, yogurt or green onions.

Enjoy!

Recipe: Sweet and Salty Fried Tempeh (Tempe Me Goreng)

Back in December I spent some time in Bali, Indonesia, and the food was fantastic! I’ve never seen such an amazing raw, vegan and gluten free scene. Not even in NYC!

One of the local dishes I tasted that I really enjoyed was a fried tempeh. For those of you unfamiliar with tempeh, it’s a fermented soy product native to Indonesia, but also widely consumed by vegans and vegetarians in the states as a protein or meat substitute at times.

I couldn’t get enough of this tempeh, it was sweet, salty, spicy and crunchy. I mean, what more is there to ask for? And, as luck would have it, I took a cooking class at the amazing Paon-Bali and this dish was on the menu. This dish traditionally uses sweet soy sauce, which is not gluten free, but in the class they had us substitute the sweet soy sauce for palm sugar syrup. If you have palm sugar syrup lying around, give it a try! For this recipe, I substituted the sweet soy sauce/palm sugar for coconut aminos and brown rice syrup.

Give it a try and let me know what you think!

Sweet and Salty Fried Tempeh

2 packages tempeh, thinly sliced*
1/2 cup + 2 tbs refined coconut oil, separated
5 red chilies**, seeds removed, thinly sliced
6 cloves garlic, thinly sliced
3 shallots, thinly sliced
2 scallions, thinly sliced
1/2 tbs kefir lime leaves***
3 tbs brown rice syrup
3 tbs coconut aminos or 2 tbs tamari (adjusted to taste)

*While not super important, the type of tempeh you use matters. If you’re new to tempeh, don’t worry about it, but if you’re familiar with tempeh and different brands, try to choose a softer variety. I’ve found that the whole grain ones are firmer, thus don’t work as well. The tempeh in Indonesia is very soft (and white!), the closest I’ve seen here is Barry’s Tempeh.

**if you can’t find red chilies, you can use whatever you can find locally, just adjust depending on your desired level of heat, the red ones are relatively mild.

***I use the jarred ones from Whole Foods, it’s difficult to find fresh kefir lime leaves. If you can’t find the jarred ones, you can use 1 tsp lime zest.

Procedure:

  1. Heat 1/2 cup coconut oil in a wide saucepan or wok.
  2. Once hot, place about 1/3 of the tempeh in the pan, you don’t want to overcrowd the pan. You can deep-fry the tempeh or pan-fry the tempeh, up to you. Both ways work well, I just prefer not to use so much oil since it ends up in the trash. To deep-fry, make sure the oil is deep enough that the tempeh is entirely covered. To pan-fry, use less oil and wait until the tempeh is cooked on one side, and then flip. In either method, wait until both sides of the tempeh are slightly brown (burned tempeh tastes icky) and remove with a slotted spoon.
  3. Continue until all the tempeh has been fried.
  4. In a separate pan, heat 2 tbs coconut oil. Once hot, add the garlic, shallot, chilies and scallions. Cook 3-5 minutes, until slightly browned, then add the kefir lime.
  5. Add the tempeh to the pan, along with the coconut aminos/tamari and brown rice syrup. Stir so the tempeh is well coated.
  6. Taste and adjust seasoning.

Enjoy!!

Fried sweet and spicy tempeh

A version with jalapeno and thai chili and no scallions. Feel free to experiment!


Eating (vegan and gluten free) in Austin, Texas

I recently took a trip to Austin, and I had to share all the wonderful food I found. I’m gluten-free (non-celiac), dairy free, and mostly vegan (I do eat eggs occasionally), so you know I’m always worried about how I’m going to eat while I’m traveling. Well, I’m happy to report that eating in Austin was not only easy, but super enjoyable. Below are some of my favorites. Let me know if I missed any and I’ll be sure to check them out next time!

Case De Luz

IMG_20170322_234425_011

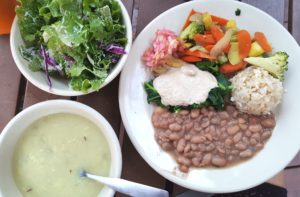
This place is special. You walk in through a magical garden of lights to a room filled with smiles. If you’ve lived on a kibbutz or in an ashram, it has that kind of feel. The menu is set and consists of a soup, salad, steamed veggies, greens, a grain and bean. There’s usually some type of pesto, tahini or nut-based sauce that comes with the veggies. Your meal comes with cold drinks (I had hibiscus) and hot tea (kukicha). They also have a-la-carte desserts. I only had the pecan pie (twice), but once I find something good I tend to stick with it! The whole place is vegan and gluten-free, so no need to worry about cross contamination. And, the price tag is quite impressive – just $12. The staff is kind and if you go alone, you’re more than likely to make some friends.

20170408_155922

Counter Culture

IMG_20170327_110346_36120170408_160901

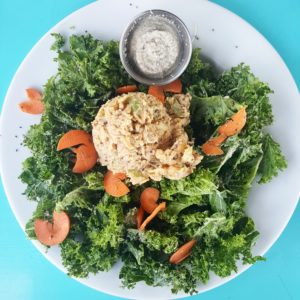
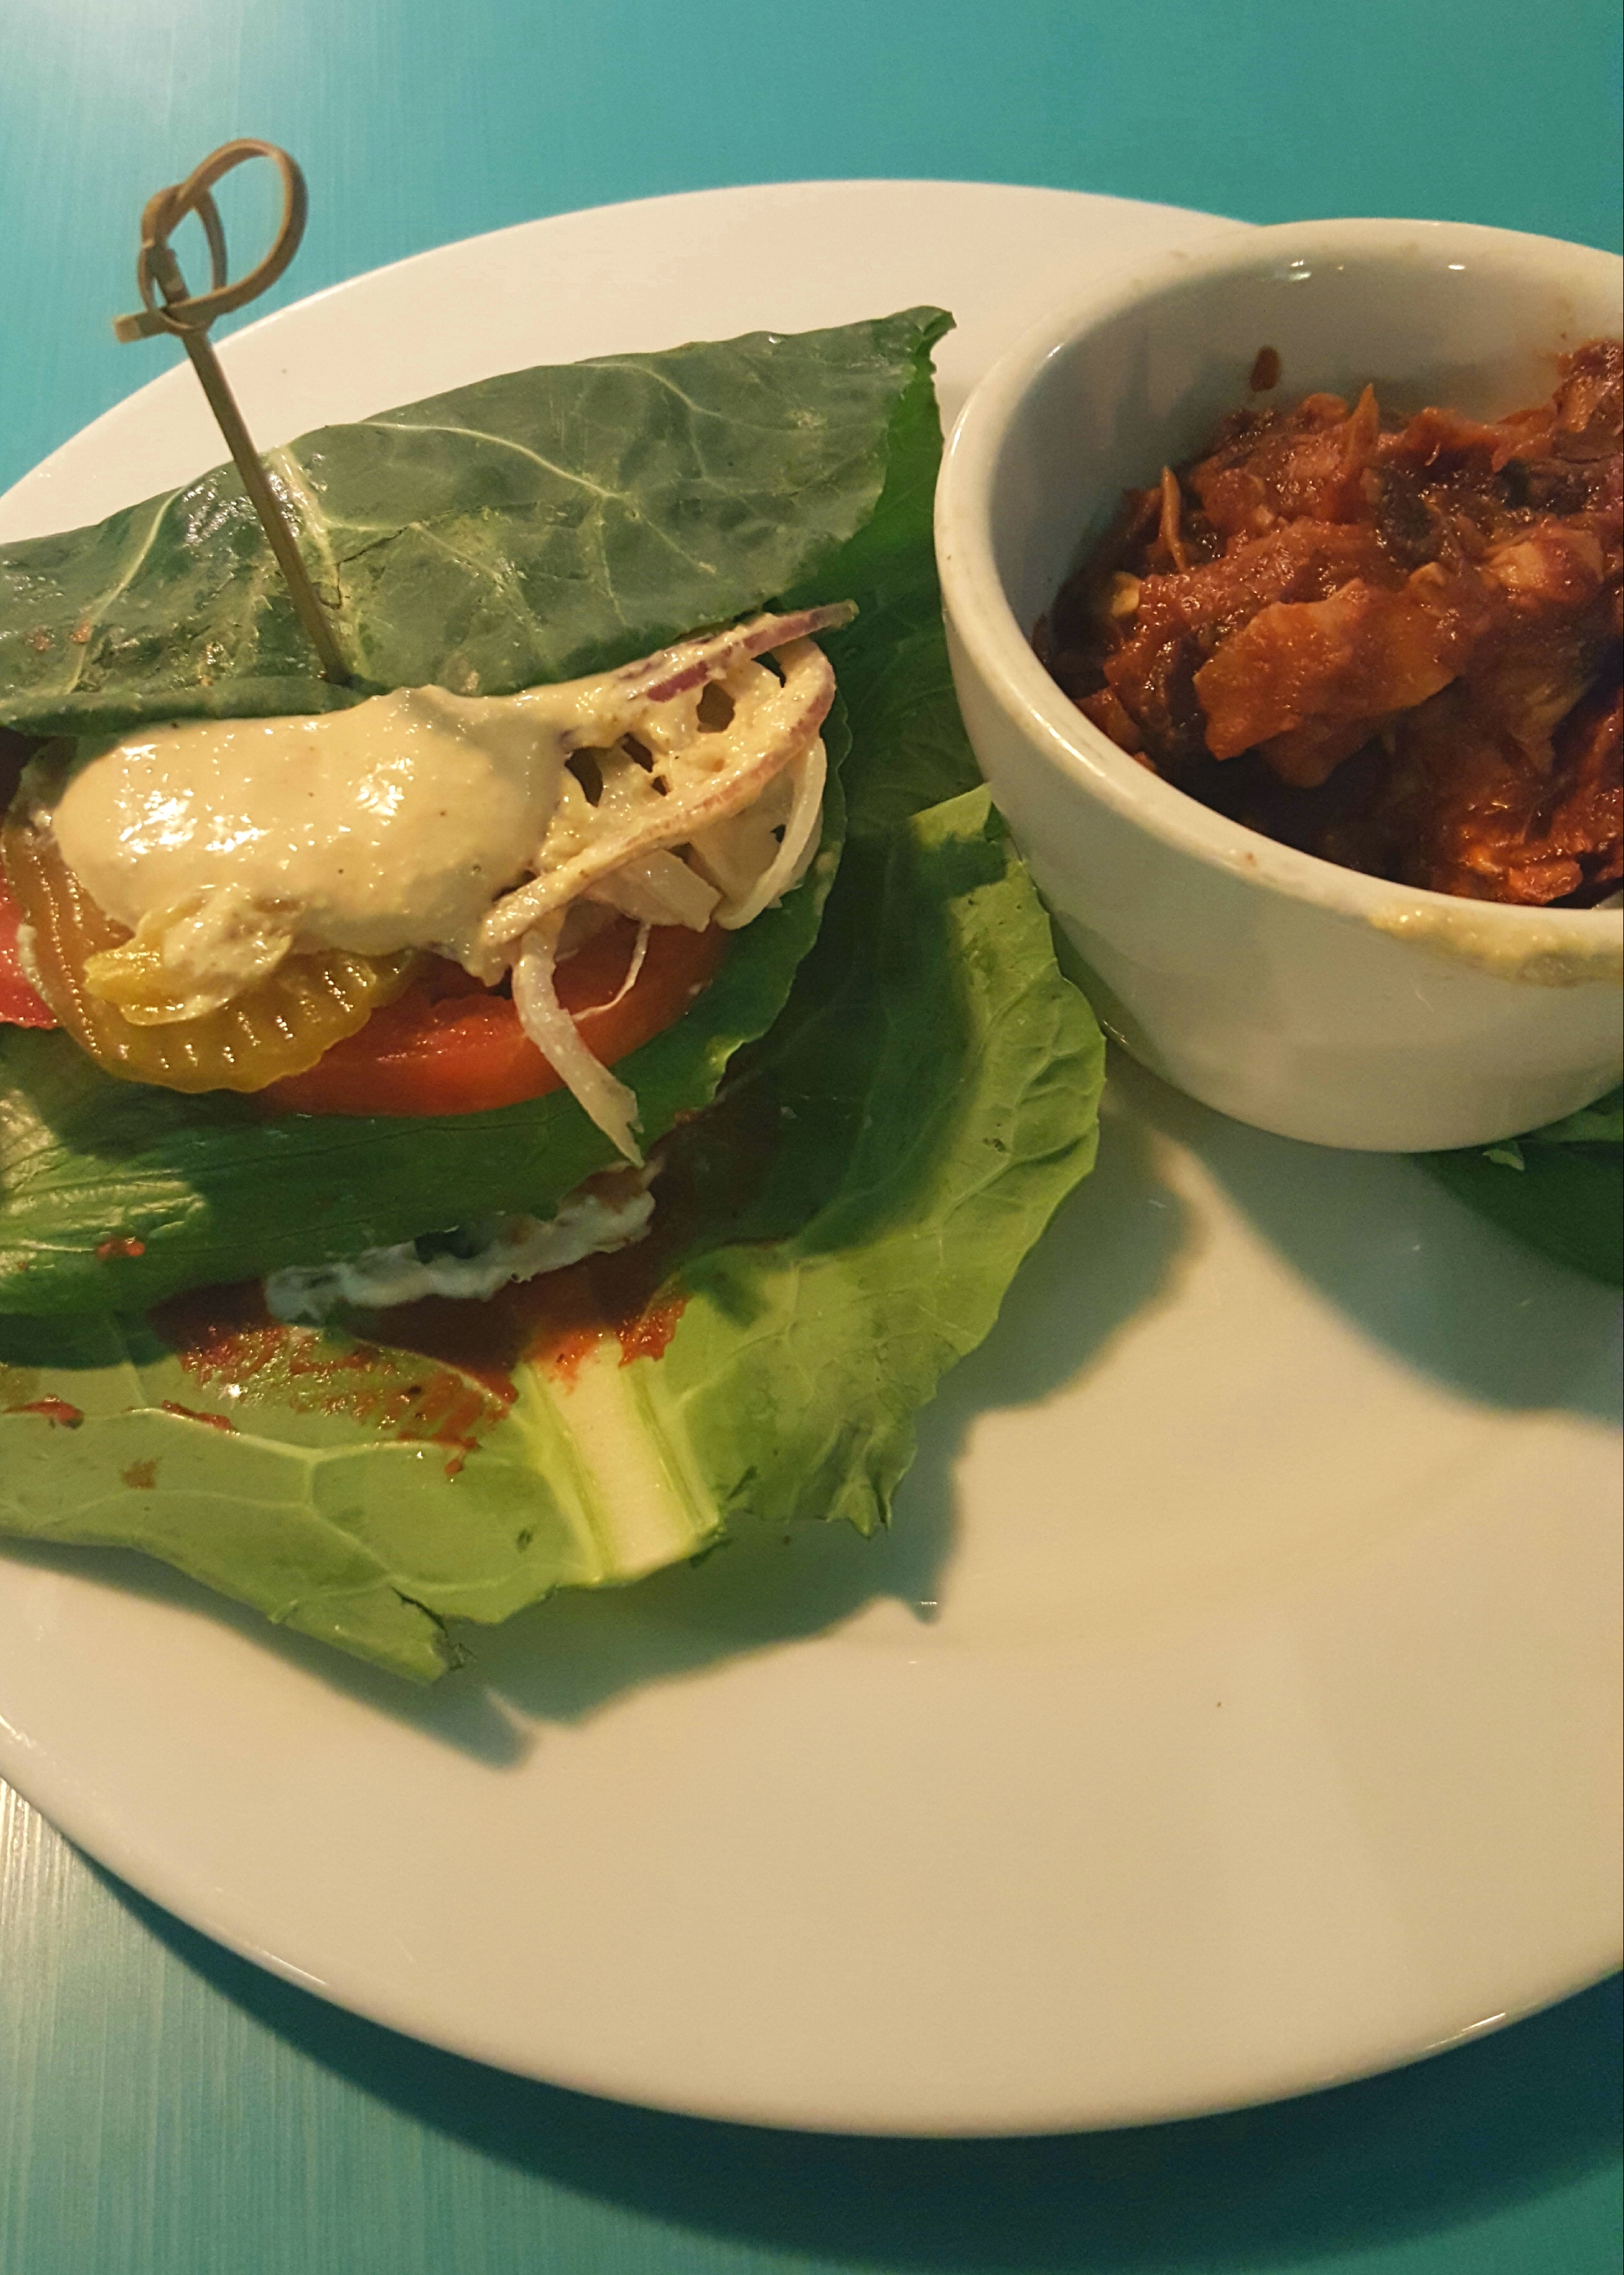
I have a special place in my heart for Counter Culture because they were my refuge when my Airbnb turned out to be a disaster and I needed a place to chill, eat and charge my phone while I figured sh*t out. Their walnut and beet burger is fantastic. I had it with a collard wrap, but they also have a gluten free bun. Their chickpea “tuna” is also fantastic. They have tons of raw (vegan/gf) desserts to choose from as well.
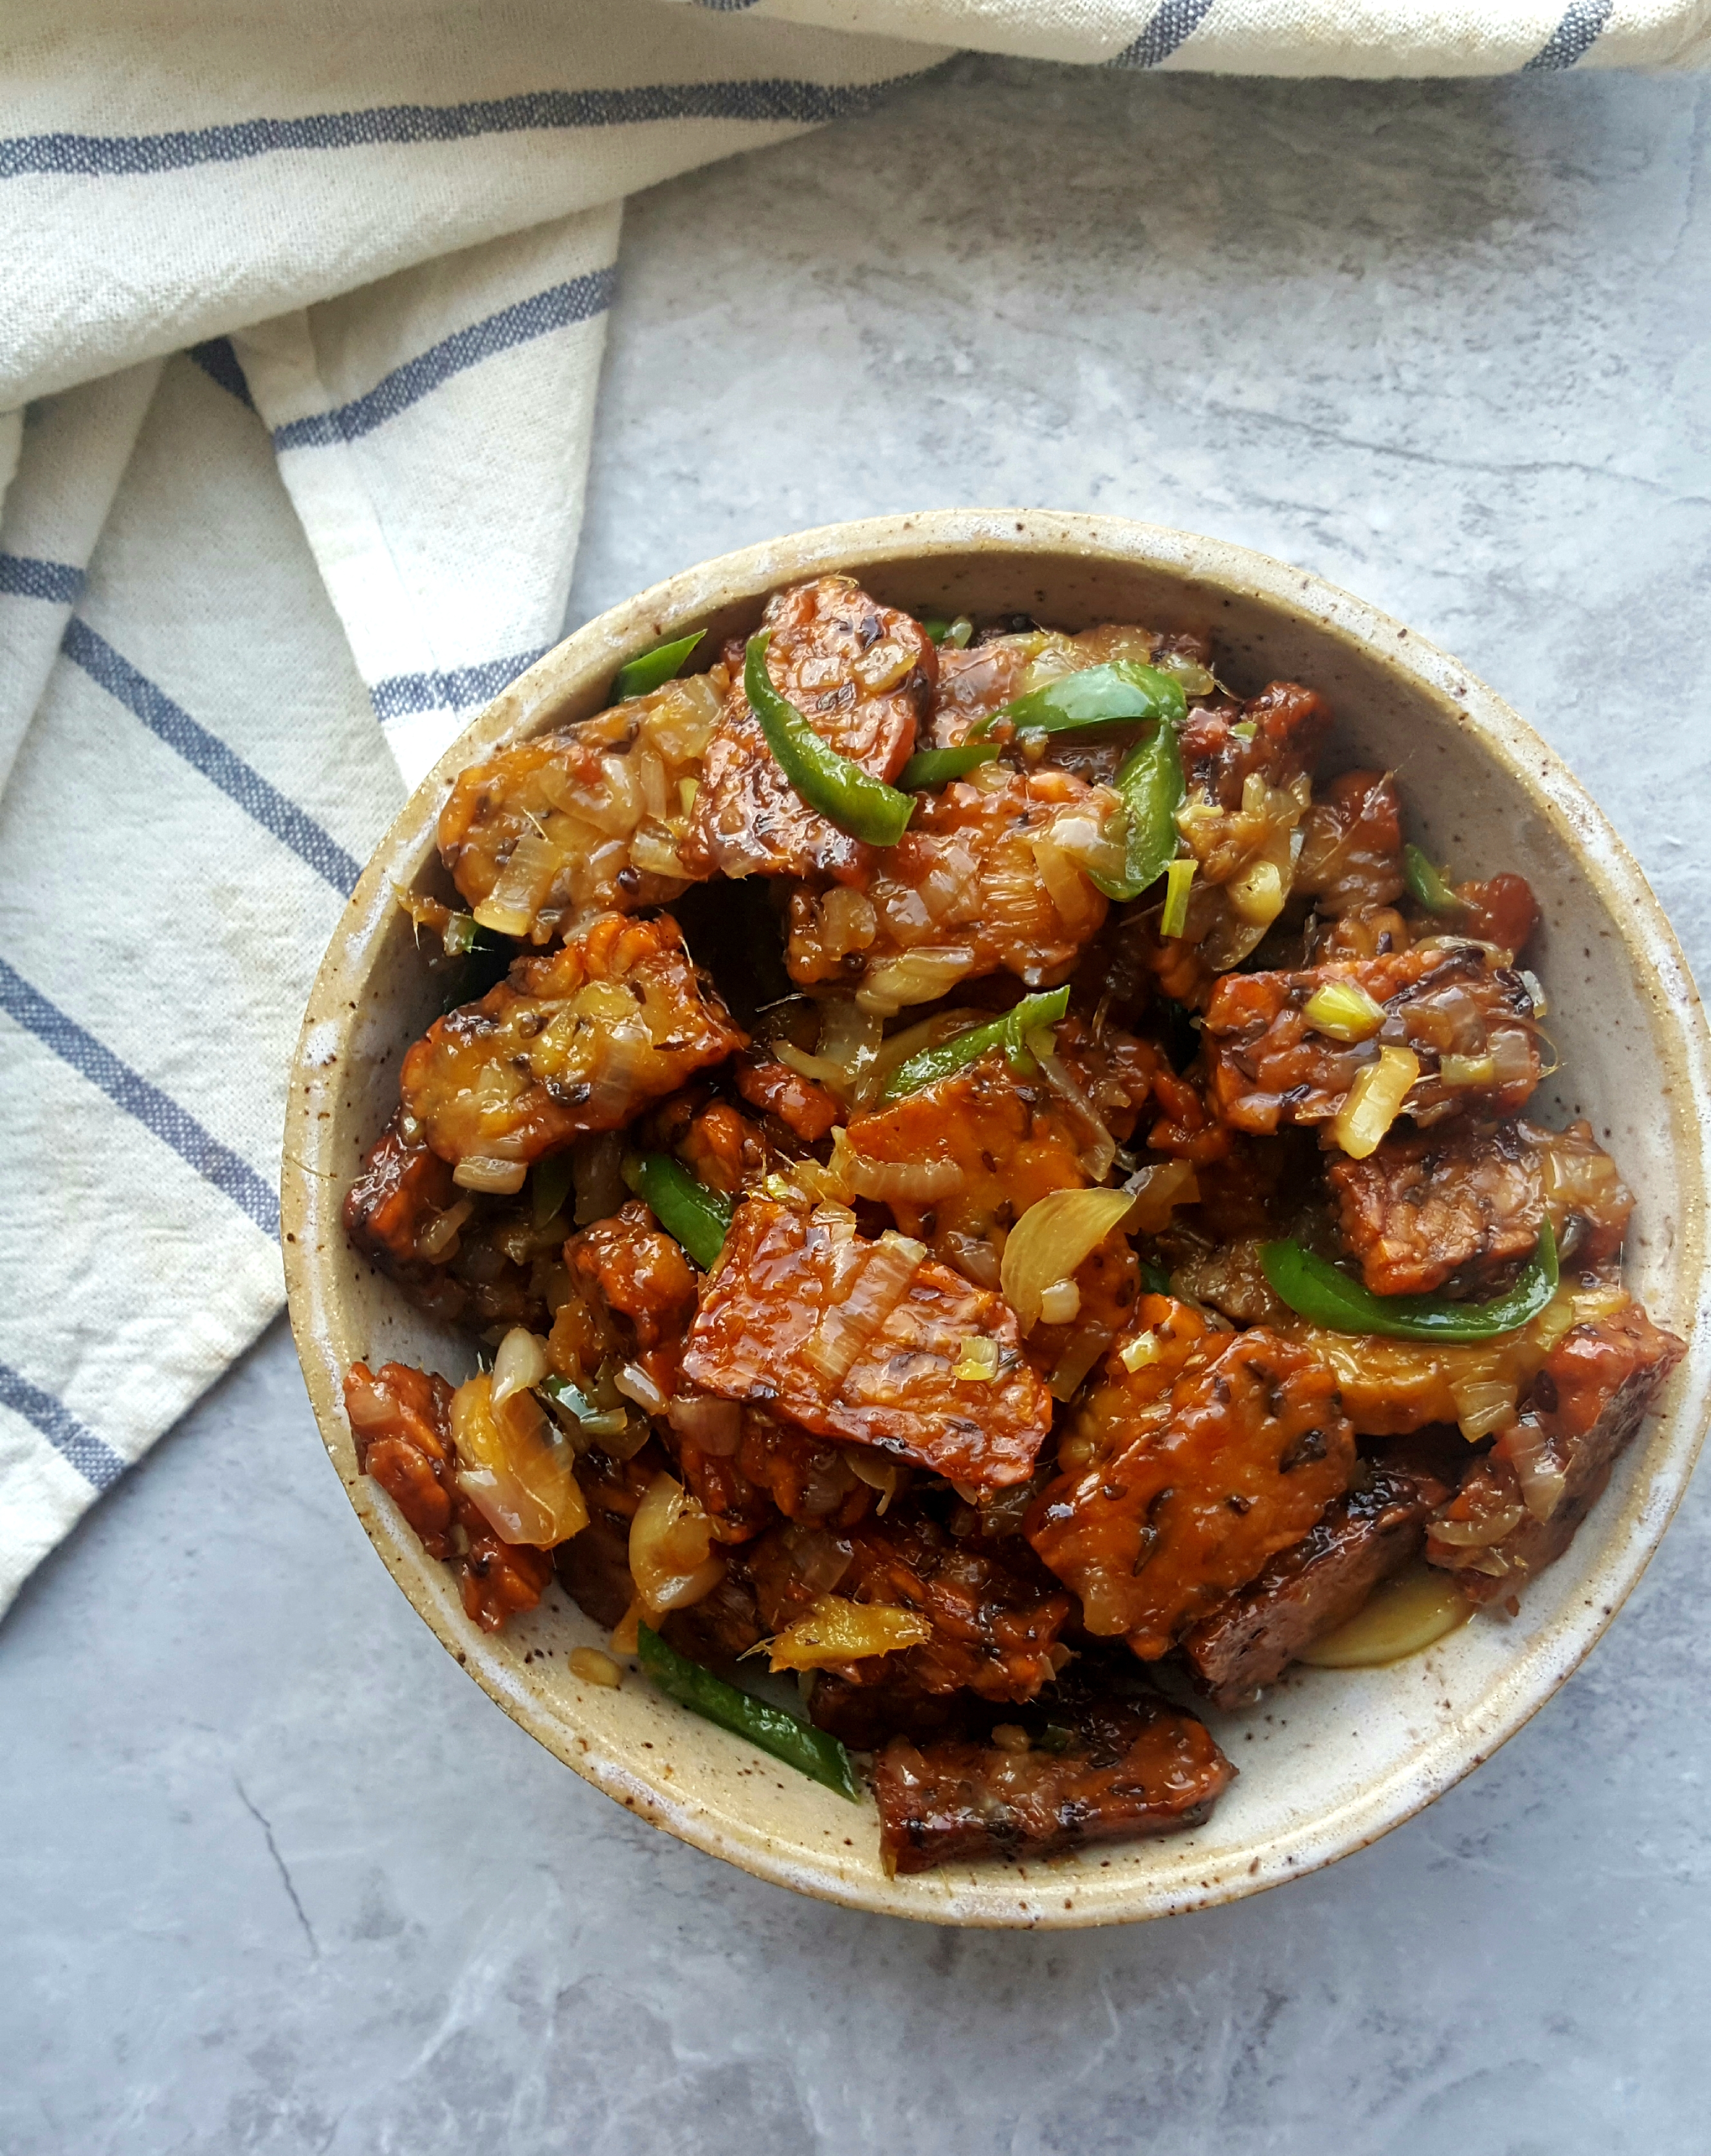
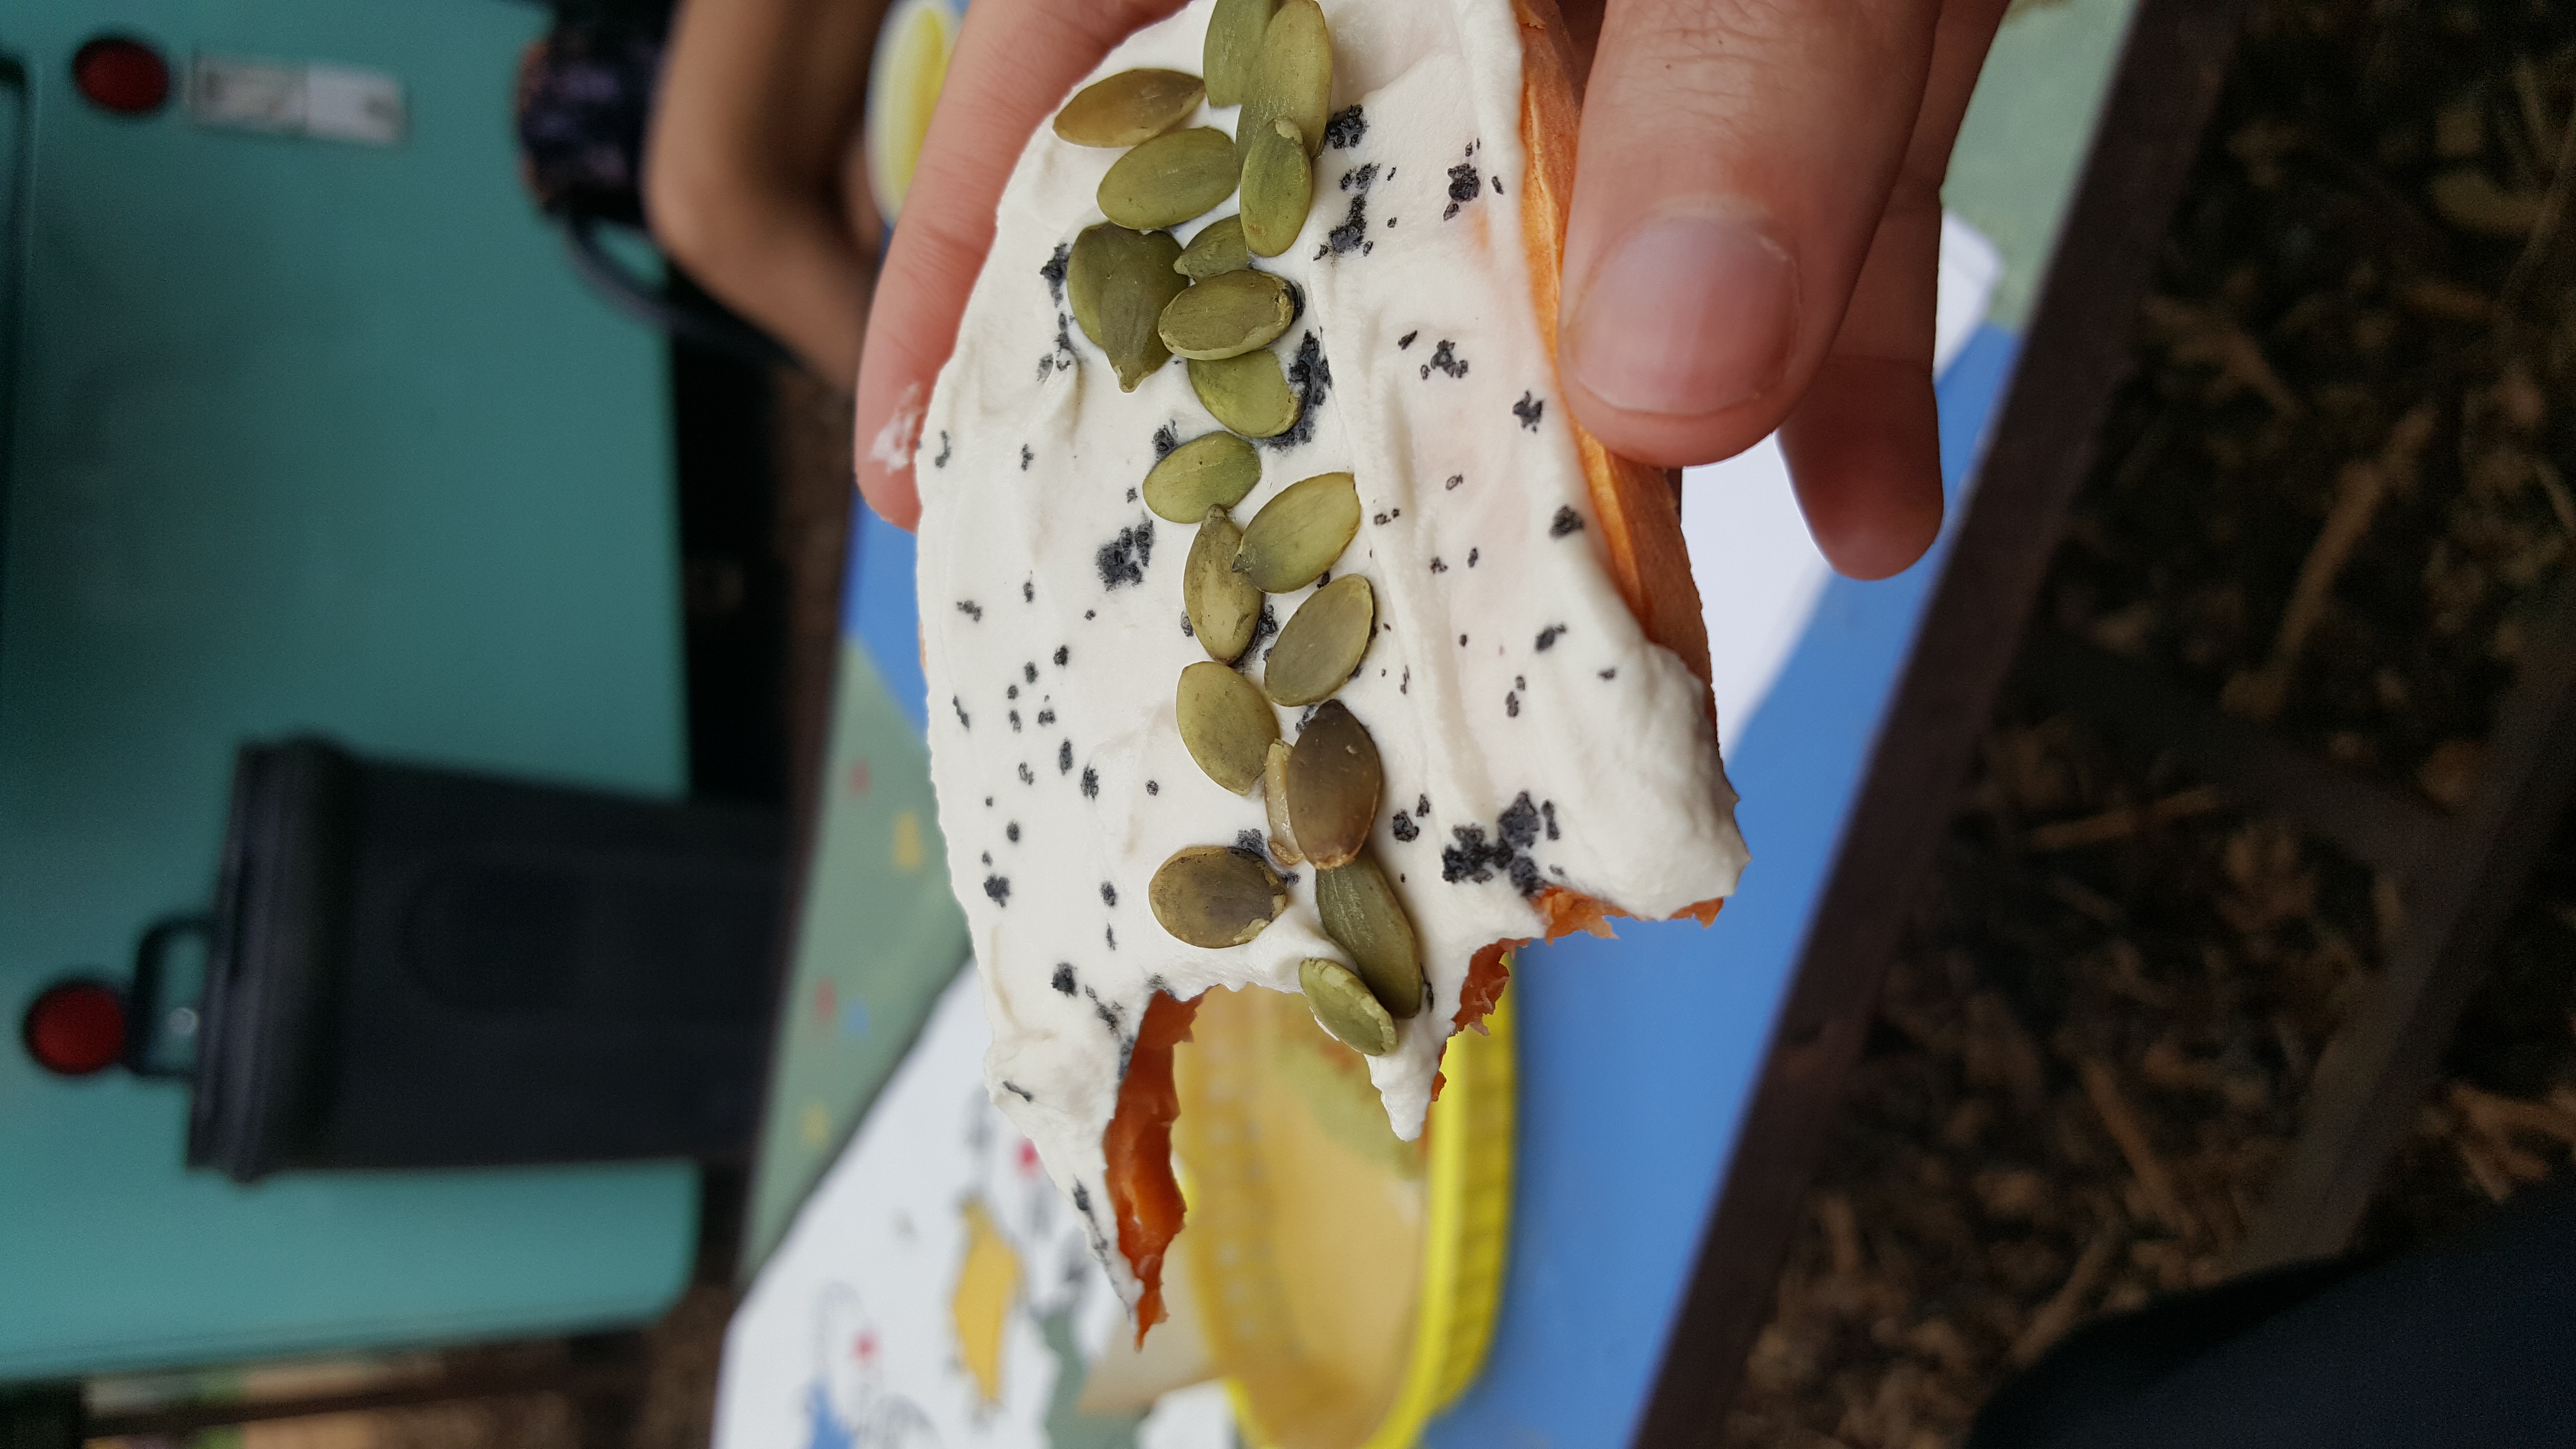
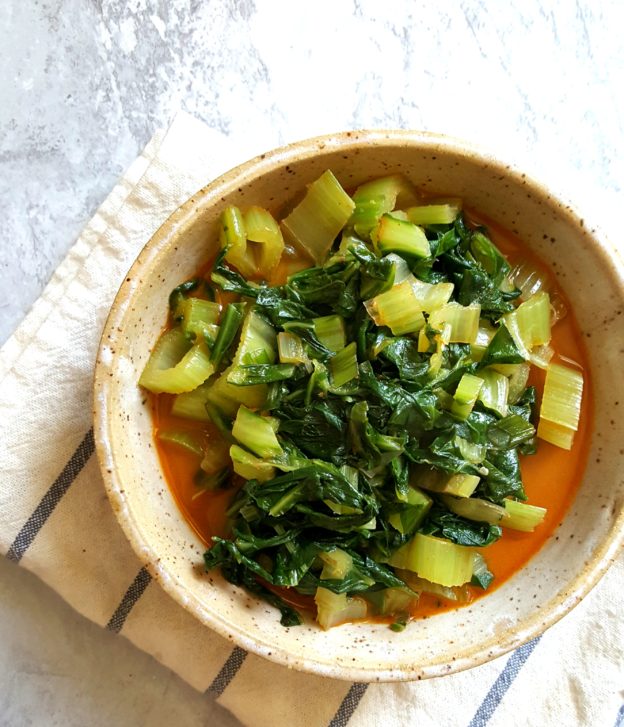
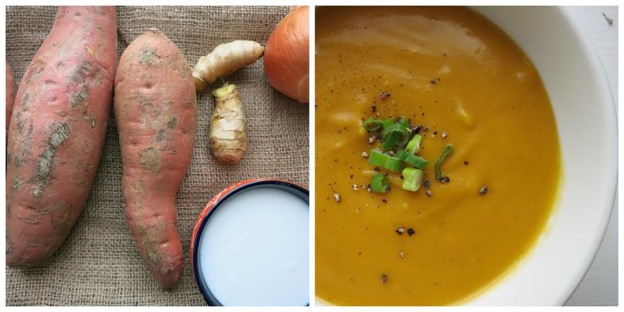
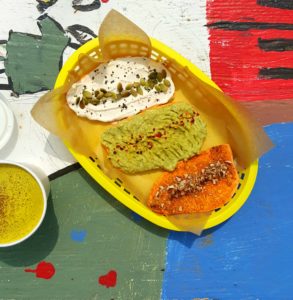
Curcuma

The best Aryuvedic food truck you could ask for. Right in the center of East Austin, the ladies at Curcuma are so warm and welcoming. The sweet potatoes toasts are delicious, my favorite was the “ricotta”.
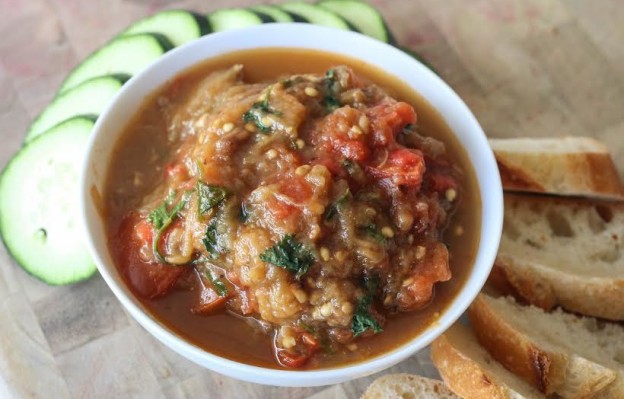
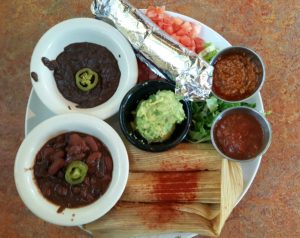
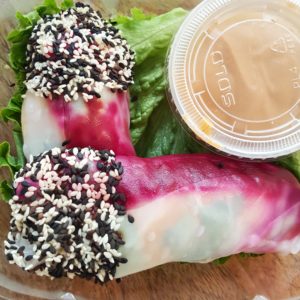
20170324_14272420170408_163900

Bouldin Creek

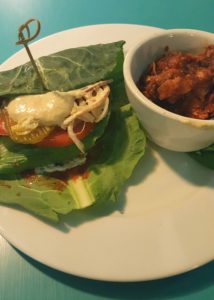
OMG, the sweet potato pecan tamales… I only ate here once, but those tamales will be on my mind for a while! Definitely go for 3 instead of 2.  The staff encouraged me to order the pecan pesto (top right), which was good, but the tamales definitely didn’t need it. My server also allowed me to try the regular and refried beans 🙂 I liked the refried best. There’s a huge selection of vegan food, less selection for vegan and gluten free, but you won’t feel like you’re missing out on anything eating these tamales, that’s for sure.  There’s also plenty of indoor and outdoor seating.
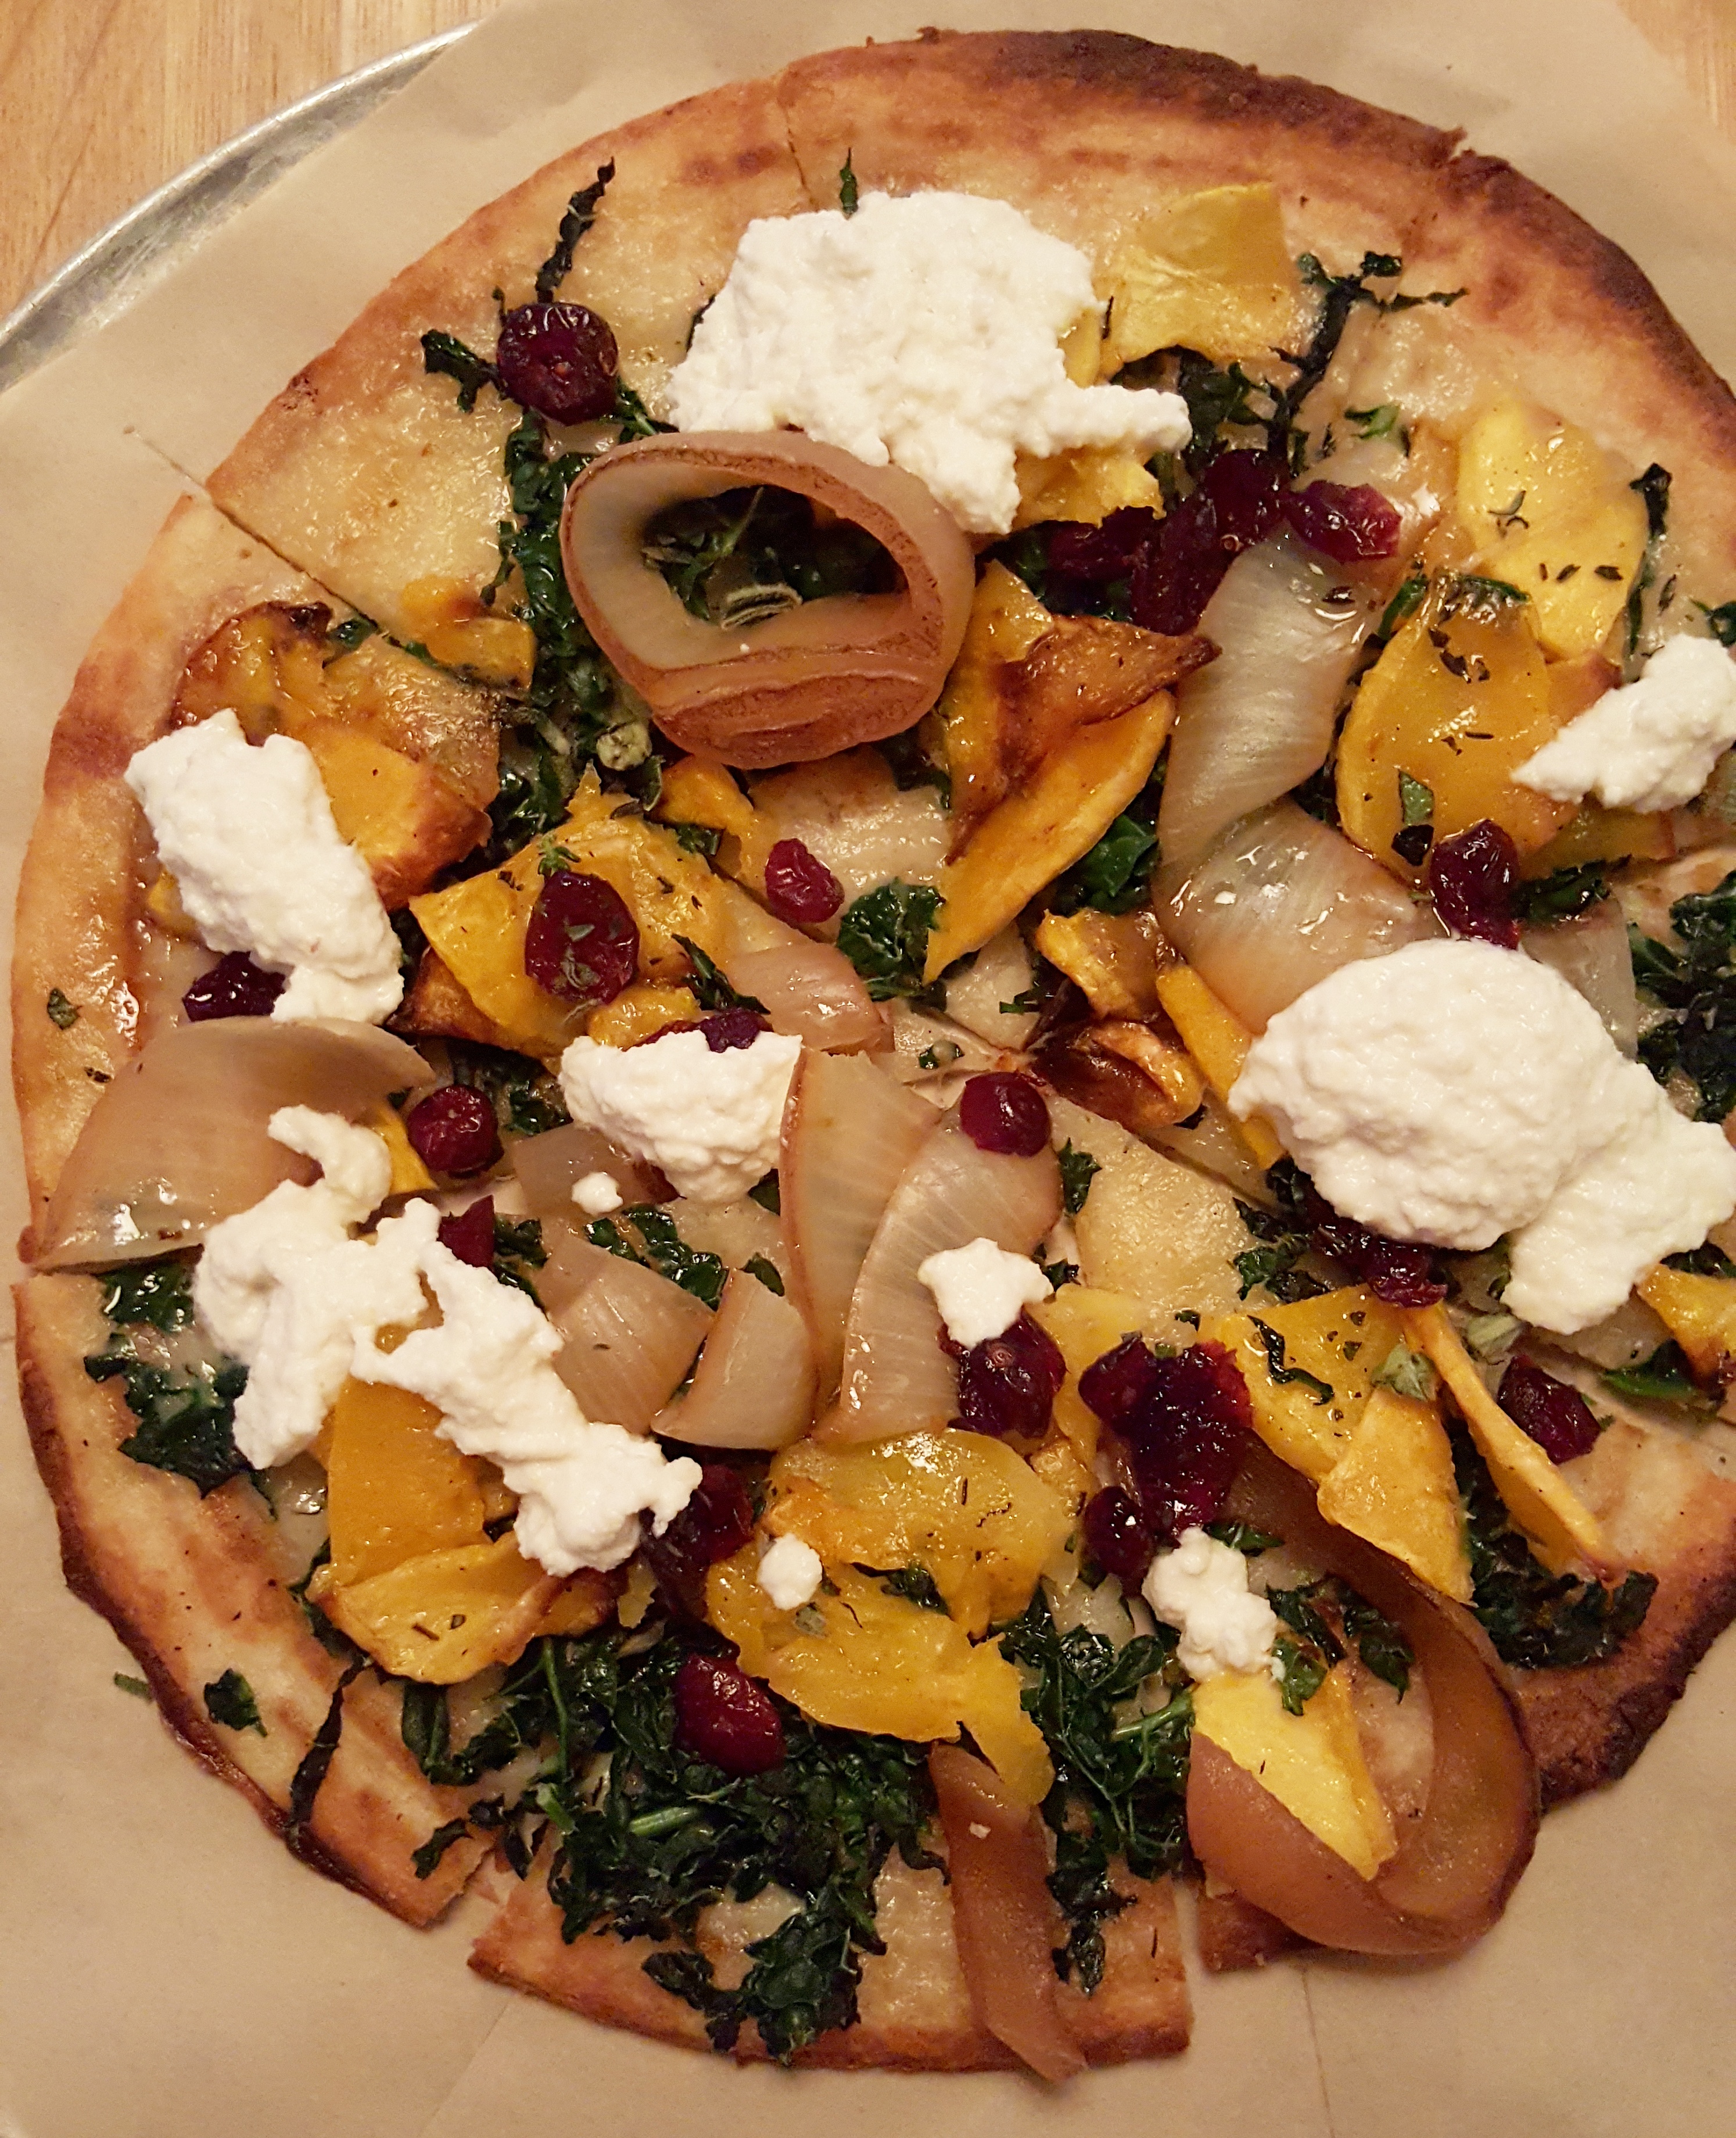
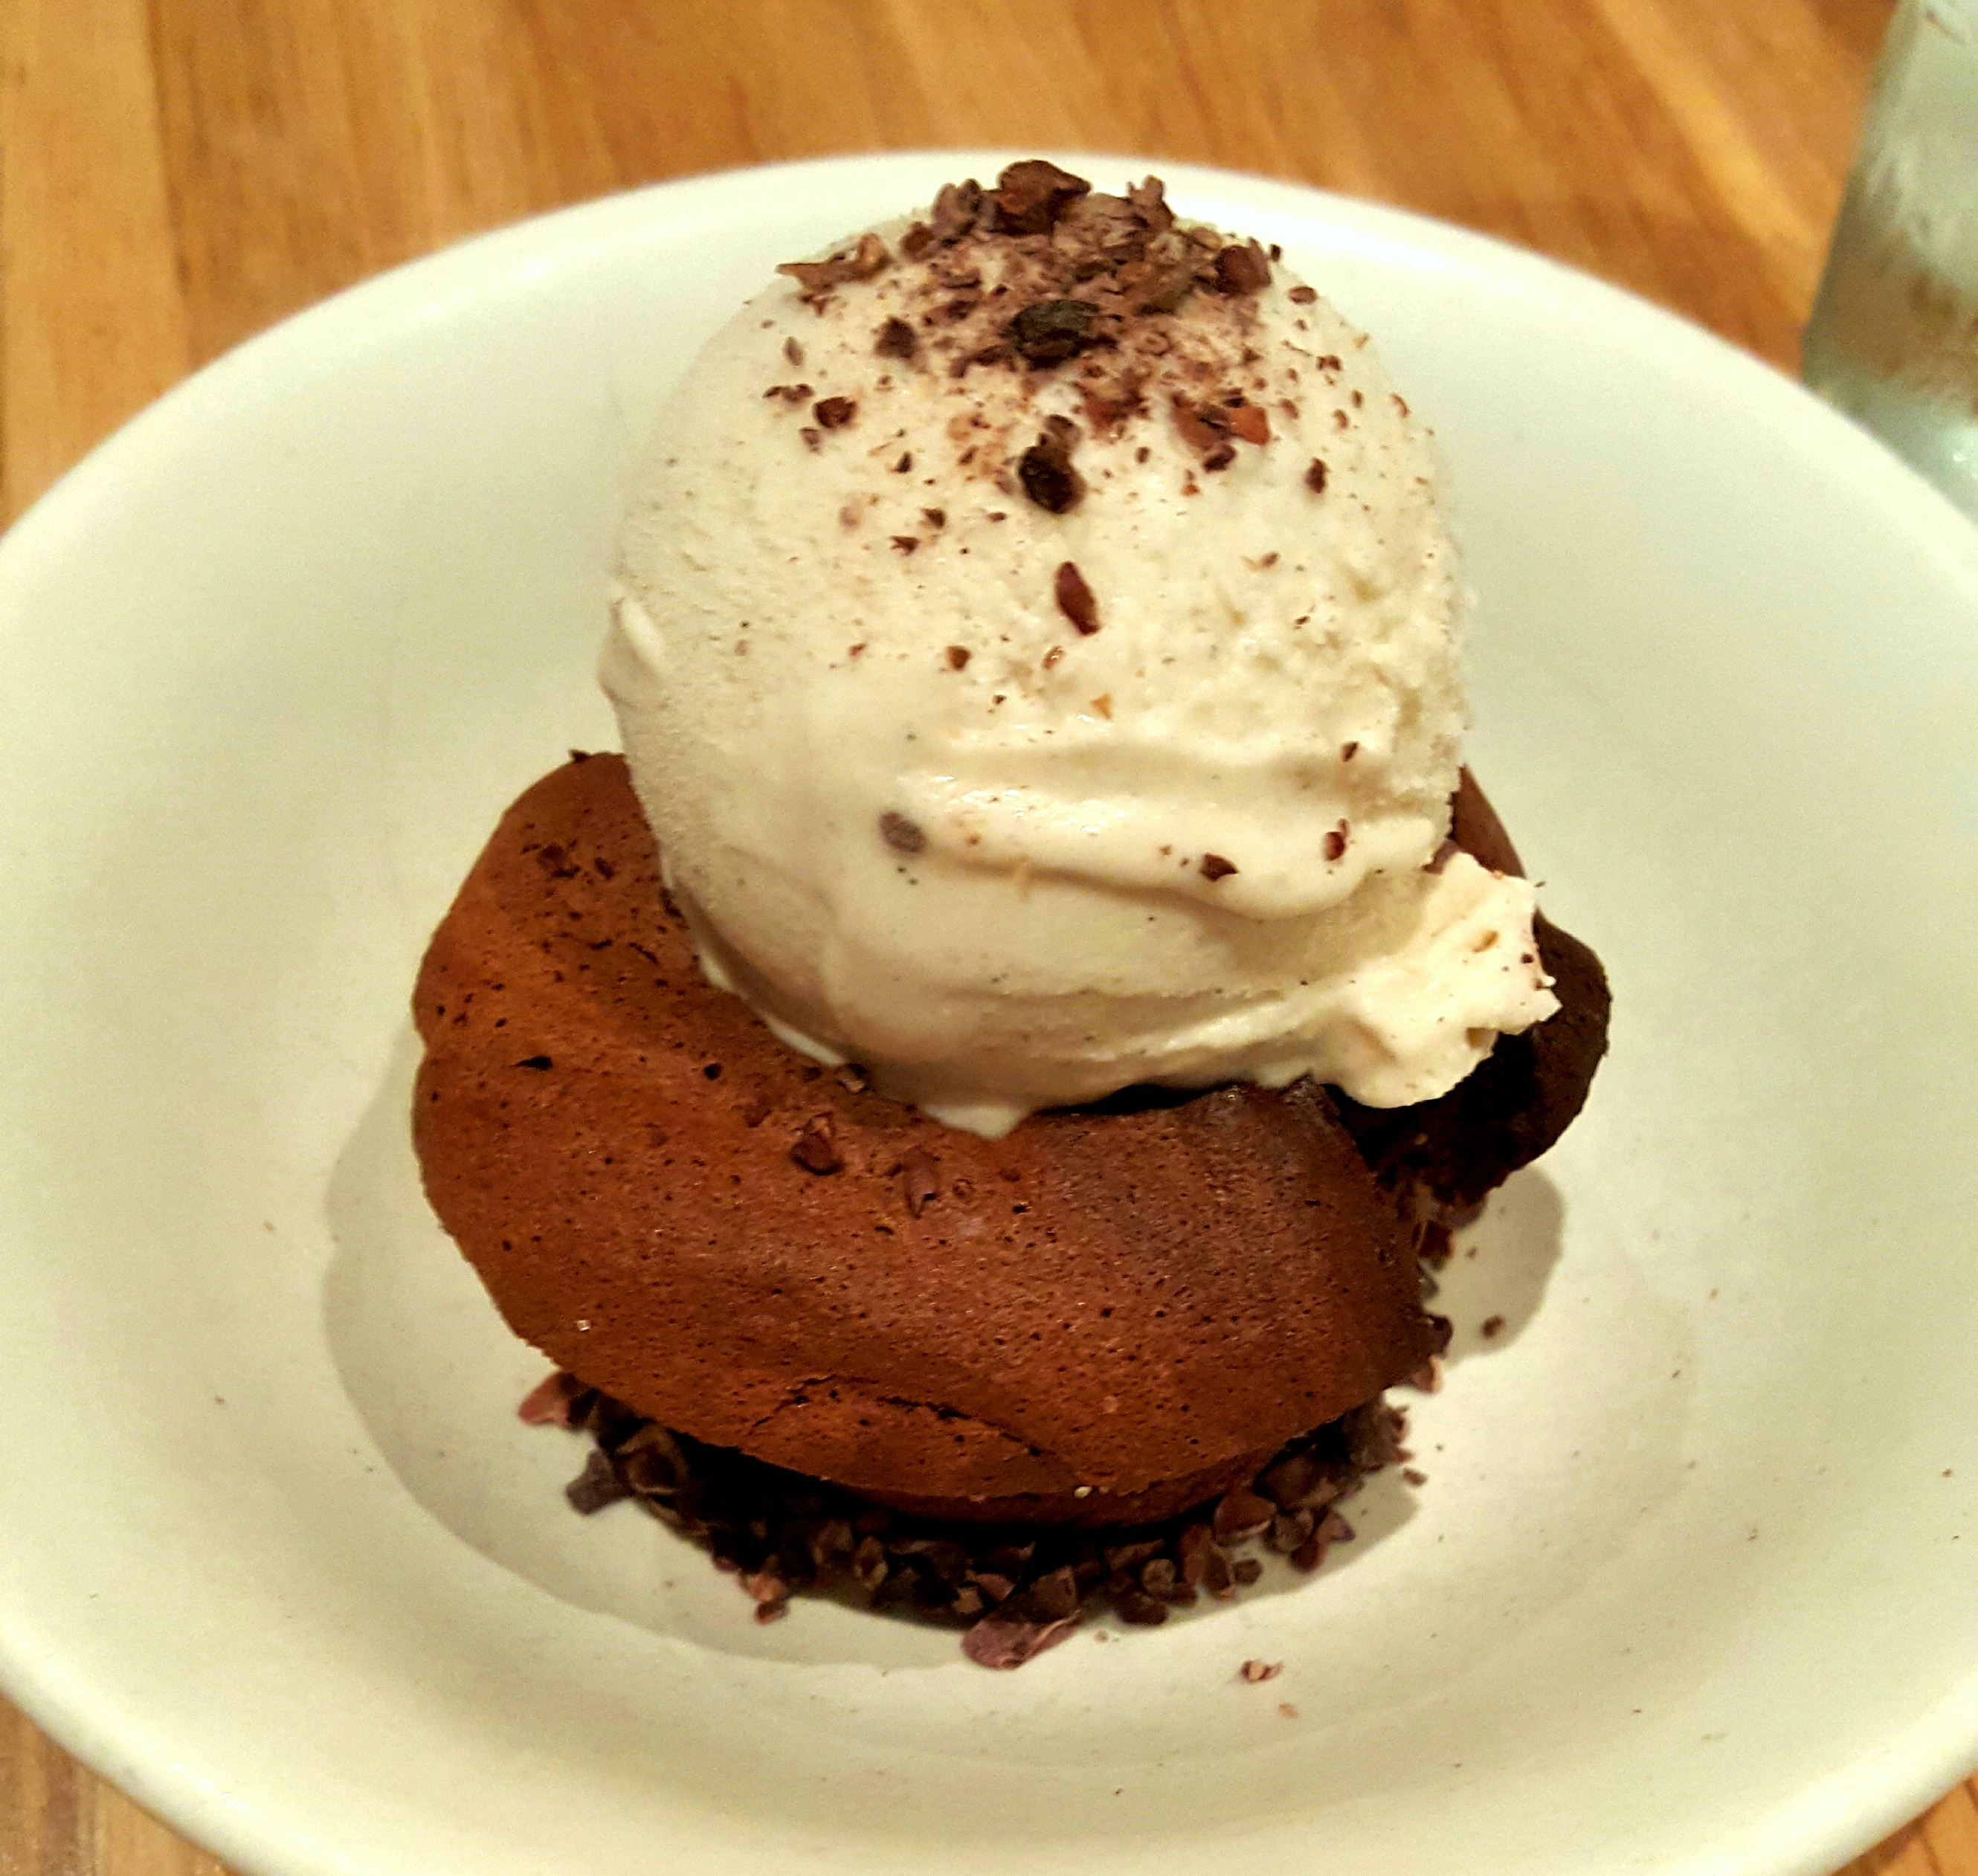
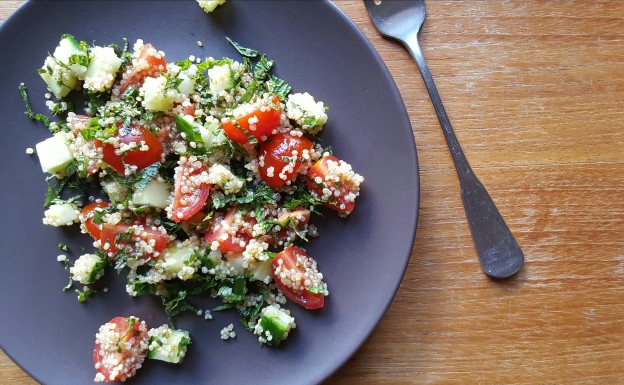
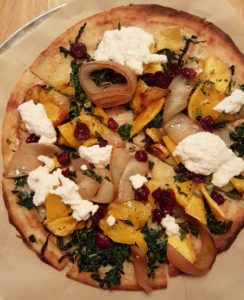
20170408_160140

True Food Kitchen

Wow. We had the vegan butternut squash, smoked onion and almond ricotta pizza on the gluten free crust. One of my favorite meals, for sure. The crust was out of this world, not like some of the gf crusts that are super thick or dense. Apparently its made with tapioca and rice flour. All I know is that I would go back for this pizza any day. We also had the mezze salad bowl (warm) and the flourless chocolate cake (gluten free and vegan if you leave off the caramel sauce). The staff was sooo informative and friendly.
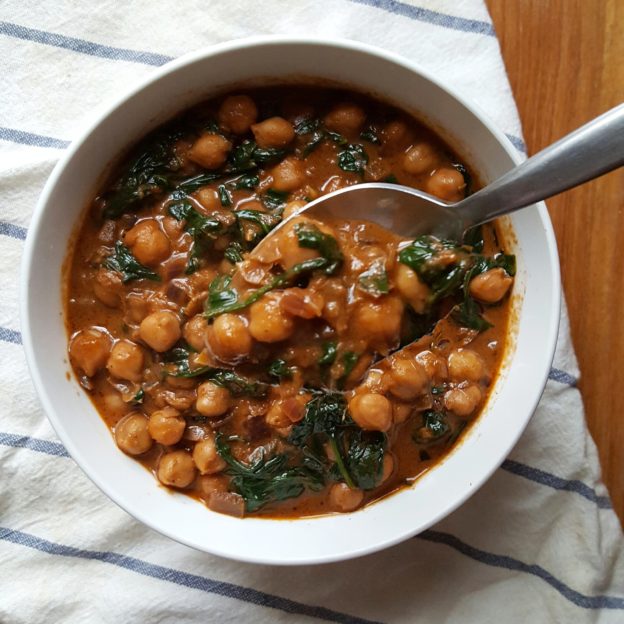
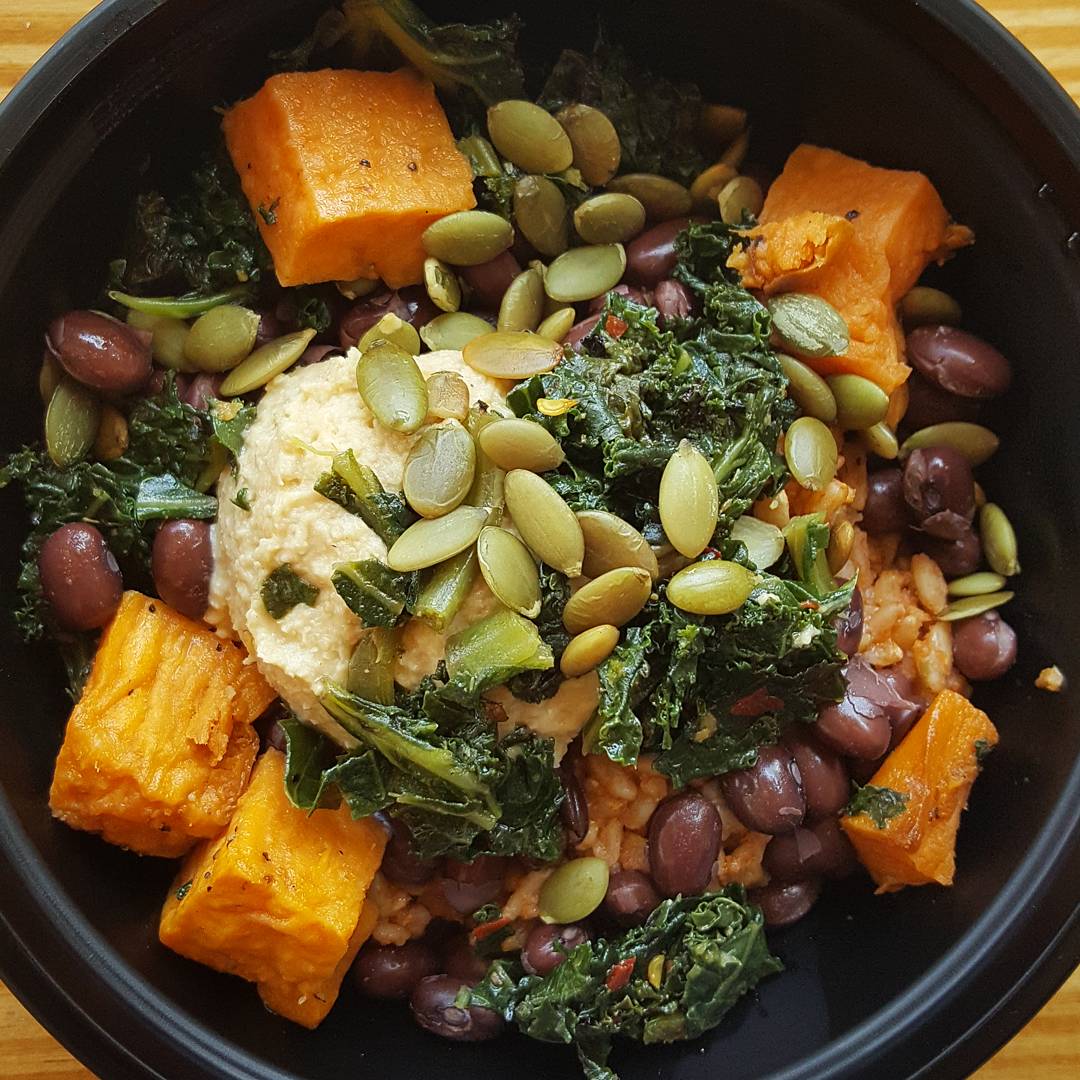
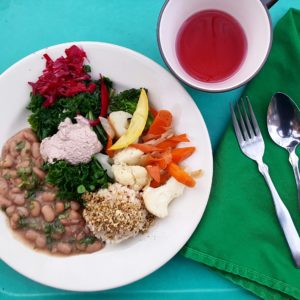
IMG_20170327_223847_68120170408_160033

Snap Kitchen

There are at least 3 Snap Kitchen locations in Austin. They are 100% gluten free and have many paleo and vegan options (that are clearly labeled). Lots of selection, lots of great dishes like this kale, hummus, brown rice and sweet potato bowl. I also really liked their black bean sliders. Only downside is everything comes in plastic (BPA free) and the only way to heat the food is in the microwaves they provide. I just ate my food cold or took it with me to go and ate it room temperature. Not the end of the world, but a bit of a downside. Definitely great options for bringing to the airport!
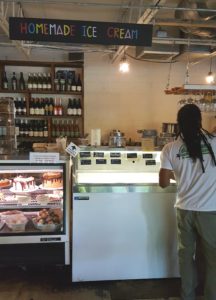
IMG_20170329_201317_898

Thai Fresh

I went for the ice cream. You got me. Cashew and coconut milk based ice cream in 10+ flavors. I tried the horchata, gluten free cookie dough, mint chocolate chip and a few others. They had a cookie batter flavor, turmeric, and a handful of other super unique and delicious ice creams. They also have a ton of gluten free and vegan baked goods. I was eyeing the lemon bar, but it just couldn’t happen that day. Next time, I’m definitely getting it.
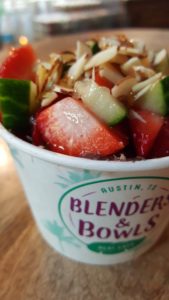
20170408_164015

Blenders and Bowls

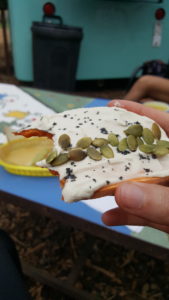
I saw at least 2 of these during my stay. I’m not really into smoothies or smoothie bowls, but sometimes it was just super hot, and I was craving something cold. I got the green smoothie bowls both times I was there, it has the least fruit and sweetener of any of their stuff, but it’s still pretty sweet. I also got one of their pre-made veggie wraps which was really good and perfect to take with me on a hike.

IMG_20170324_092903_10720170322_104505

There were also a number of places that had gluten free, vegan and vegetarian options that just required some modification. I had delicious Tacos at Torchy’s (an Austin staple), Veracruz (check them out on Food Network) and Whole Foods (their taco bar piles free steamed kale on any taco!)

IMG_20170328_090500_407

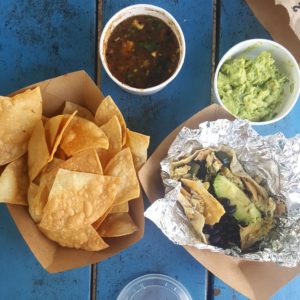
Veracruz chips, guac, amazing salsa and migas.


Recipe: Super Simple Swiss Chard

People always ask me for my favorite health tips. While I really like to customize my recommendations to each individual, eating more greens is always on the list. Leafy greens, including Swiss chard, are some of the most nutrient dense foods. They’re also rich in fiber which is one of the most important keys to good gut health.

A lot of people don’t like greens because they find them bitter, or they’re unsure how to cook them. I totally get it. Sometimes I don’t really want to bother with chopping up veggies or aromatics like onion, ginger and garlic. So, today I made this super simple Swiss chard (it was becoming do or die for my Swiss chard, I was a little overambitious grocery shopping last week). The curry paste is store bought, but it’s really great quality and tastes great. You can read more about the curry pastes I recommend here.

This can be eaten as a side dish, or with quinoa and a fried egg to make a complete meal. You can also add any other veggies to this to make it more substantial. Give it a try and let me know what you think.

Ingredients:

1 bunch Swiss chard
1/2 tbs coconut oil
2-4 teaspoons Thai kitchen red curry paste
3/4 cup coconut milk*
salt to taste

*use leftover coconut milk to make this awesome DIY leave in hair conditioner.

  1. Separate the leaves and stems of the Swiss chard. Dice the stems and thinly slice the leaves. Keep them separate**
  2. Heat oil in a wok or saute pan. When hot, and the curry paste and a pinch of salt and stir.
  3. Add the chard stems and cook for 3 minutes, then add in the leaves.
  4. Saute on medium heat for 3 minutes. Add the coconut milk.
  5. Cook on low heat until the chard is tender and cooked through. I cook it for about 10 minutes total, but it depends on how soft you like your greens.

**I cut and cook the greens and stems together when I’m cooking for myself. It takes less time and I’m fine with the stems being a little firmer. Feel free to experiment with both ways.

curry green beans

Recipe: Curried Coconut Green Beans

I have the privilege of working at one of the best places I could imagine, the Natural Gourmet Institute (NGI). I had been having a one way love affair with them since 2003, when Kathryn Bari, a graduate and chef, had me fall in love with healthy food. So, you can imagine how happy I was when I started working at NGI last year. It felt like everything was coming full circle.

The food at NGI is spectacular, but sometimes the recipes require more time, energy and ingredients than I really want to deal with. It’s great for special occasions, when I’m cooking for a client, or when I really want to treat myself, but sometimes I want a similar dish without all the frills.

When I tried Chef Rich’s Curried Coconut Green Beans dish, I was hooked. It was so flavorful and satisfying. I’ve made it over a dozen times since, and I’m very happy with my alterations to the recipe. Enjoy!

Curried Coconut Green Beans

Ingredients

  • 1 lb green beans, cut into 1 inch pieces
  • 1/2 cup shredded coconut (unsweetened)
  • 1 tsp mustard seeds, if you have them
  • 1 tbs curry powder, divided
  • 1 tbs coconut oil
  • 1 jalapeno or thai bird chili (if you like heat)
  • 2 shallots, minced
  • 1/2 tbs minced ginger
  • 3-4 fresh curry leaves if you can find them
  • salt to taste

Directions

  1. Heat coconut oil in a large wok or saute pan.
  2. Add the mustard seeds and wait until they pop, about 30 seconds to 1 minute.
  3. Add the curry leaves, shallots and hot peppers if you’re using them. Cook for 1-2 minutes.
  4. Add the curry powder and ginger, and cook an additional 30 seconds.
  5. Add the green beans, and cook to your liking. About 5-7 minutes.
  6. Once the green beans are tender, add the shredded coconut and stir to coat the green beans.
  7. Cook until heated through. Adjust salt and curry powder to your liking.
Fig energy bites

Recipe: Fig Energy Bites

I first made these divine energy bites with Mickey, the creator of the AutoImmune Protocol. I was surprised at how just a few ingredients could pack such a flavor and texture punch. Since making the original recipe, I’ve experimented with adding additional spices and using different dried fruits.

Apricots are a perfect variation to this recipe. You could use half figs and half apricots, or do one batch with figs and another with apricots. You’ll never get bored! Cardamom also tastes great with these. It’s one of my favorite spices and I definitely add it to anything sweet that I make. Like cinnamon and vanilla, it adds a little extra sweetness without any sugar. Cinnamon and cardamom are also good for digestion. Cardamom is said to help eliminate gas and bloating, while cinnamon helps us digest fats by increasing enzyme activity in our bodies. Cinnamon may also lower blood sugar and it’s anti-inflammatory. Now that’s as good a reason as any for adding cardamom and cinnamon to our food!

These energy bites are also great for a quick snack, dessert or pre-workout treat.  Hello versatility! There’s lots of good fat in them from the coconut oil, and fiber from the dried fruit and coconut. The combination of fiber, fat and sweetness will help keep you satisfied longer without spiking your blood sugar (I’m sure we’re all familiar with the quick surge of energy we get after eating something sweet, that’s followed by the strong desire to take a nap).

Fig Energy Bites

INGREDIENTS

2 cups shredded coconut (unsweetened)
2 cups dried figs (unsweetened and unsulfered)
1/3 cup coconut oil
a pinch of salt
a dash of cinnamon and/or cardamom
1/4 teaspoon vanilla (optional)

DIRECTIONS

Place all ingredients in a food processor and pulse until well combined. Make sure to remove any pits, seeds or tough stems from the figs or apricots. Roll into balls and store in the fridge. Because of the coconut oil, energy bites kept in the fridge will have a creamier texture. Room temperature energy bites will be a little more oily.

shiitake bacon

Recipe: Shiitake Bacon

I’ve been a vegetarian since I was 5, and I’ve never had bacon! But, I hear this stuff is pretty close to the real thing! The first time I had shiitake bacon was at the Natural Gourmet Institute, and it was just so yummy! Crispy, kinda sweet, salty and lots of umami. You can’t go wrong!

And if taste wasn’t enough to hook you, shiitake mushrooms also have tons of health benefits. They have been used in Chinese medicine for ages, and are a great source of non-animal based iron and B vitamins. They also have immune boosting properties and support cardiovascular health. I’m sold!

Shiitake bacon is a great way to get more mushrooms in your diet, and it’s also super easy to make. One of my good friends even makes a batch of this every week as part of his meal prep. It’s great in soups, in sandwiches, on top of mac and cheese, as a snack and anywhere else! My one suggestion… make a lot! They definitely shrink and will go quickly. Trust me, your family, guests and friends will be impressed.

Once you get the hang of a basic shiitake bacon, feel free to experiment with fun additions like smoked paprika, tamari, maple syrup, cayenne, liquid smoke and other flavor enhancers.

Shiitake Bacon

Ingredients

2 cups shiitake mushrooms (thinly sliced)
1 tablespoon olive oil
salt (to taste)
*tamari, maple syrup and smoked paprika are lovely optional additions

Instructions

1. Preheat oven to 350 degrees.
2. Thinly slice the shiitake mushrooms.
3. Coat with olive oil and sprinkle with salt (add any of the optional ingredients here).
4. Place on a baking sheet in a single layer – make sure not to crowd them.
5. Bake for 10-15 minutes (cooking time will vary depending on how thin the mushrooms are sliced).
6. Remove from the oven and flip, baking another 10 minutes until the mushrooms are crispy. Feel free to cook to your personal taste. I like mine a little less well done, other people like them on the verge of being burnt.

quinoa tabbouleh

Recipe: Quinoa Tabbouleh (gluten free and vegan)

Tabbouleh is a traditional Middle Eastern dish made with bulgar wheat. You may have had it in Turkish restaurants, or seen it at Costco (my mom got a big tub of it for her 60th birthday party yesterday!). But, if you or your guests/friends/family are gluten-free, bulgar wheat is a no no. Quick fix? Switch out the bulgar for quinoa and you have Quinoa Tabbouleh! Honestly, I never liked tabbouleh before making it this way. If you’ve never had it, give it a shot. You can also make it your own by adding in the type of herbs that appeal to you. I personally love the mint, I think it really brightens up this dish.

Quinoa Tabbouleh

Makes 8 servings

Ingredients

  • 1 cup uncooked quinoa
  • 2 lemons, juiced
  • 2 cups of flat leaf parsley, chopped
  • 1/2 cup mint, chopped
  • 1/3 cup scallions, sliced
  • 2 pints cherry tomatoes (about 3 cups), halved
  • 1 garlic clove, minced (optional)
  • 1/4 cup of extra-virgin olive oil, divided
  • 1 teaspoon salt
  • 2 small cucumbers (Persian or English are best because they have less seeds), diced

Directions

  1. Cook quinoa with ½ tsp salt and two cups water. Bring to a boil then lower heat and cover for 15 minutes. Turn off the heat and let it sit, covered, for another 5 minutes and then fluff with a fork.
  2. Mince the garlic and put it in the lemon juice to sit. Chop the herbs, scallions and the rest of the ingredients.
  3. When the quinoa is done, add 3 tablespoons of olive oil, 3 tablespoon of lemon juice, and 1/2 teaspoon of salt. Toss to coat the grains.
  4. Add the rest of the herbs and vegetables to the bowl along with 1 tablespoons olive oil and 1 tablespoon lemon juice. Mix and adjust seasoning

Happy Eating!

zaalouk eggplant and tomato dip

Recipe: Zaalouk: Eggplant and Tomato Dip/Spread

10/30/2013

Yesterday I had some people over for lunch and one of the things we made was zaalouk, a traditional middle eastern eggplant and tomato dish. It has all but 5 ingredients (not including olive oil and a few spices) and is super easy to make. Feel free to be inspired and add any other types of herbs or spices you like!

Zaalouk Eggplant and Tomato Spread

Ingredients
1 eggplant
4 plum tomatoes*
1/3 cup olive oil
1 lemon
1/3-1/2 cup cilantro depending on how much you like it
1/3 cup water
3 garlic cloves
1 tbs cumin
1 tbs paprika
salt and pepper to taste
cayenne if you like some heat

Directions
1. Slice the eggplant in half the long way and roast it at 400 until it’s soft (about 30 minutes).
2. Separate the flesh of the eggplant from the skin and rough chop it.
3. Mince the garlic, chop the cilantro and dice the tomatoes.
4. Heat pan with the olive oil. Saute the garlic in the oil for a minute or so and then add the eggplant flesh (discard the skin… or compost it if you’re cool like that), the tomatoes, cilantro, spices and water. Cover the pan and lower the heat to medium.
5. Check on the pan every once in a while to make sure there is enough liquid, you can also stir it around and help mash it together. Leave it covered and cooking for 25-30 minutes.
6. After 25-30 minutes, take off the cover and continue to let the mixture simmer if it is too liquidy. Add lemon juice and any additional salt and pepper.

*I’ve had some people reach out who can’t eat tomatoes. If you’d like to try a version of this without tomatoes, use pureed roasted red peppers.

sweet potato soup

Sweet Potato Soup

Last month I hosted a dinner party for my dearest girlfriends. One of the most popular recipes from the night was my simple sweet potato soup. I love this soup because it is creamy without any dairy, and the sweet potatoes are extra delicious and nutritious right now because they’re in season. This soup is rich enough that you could eat it on its own for a light dinner. It’s also vegan, vegetarian, paleo, gluten-free and has no added sugar. Delicious and good for you? That’s a win win! Stay tuned for more of my favorite recipes in my upcoming ebook, Loving Your Leftovers!

Creamy Sweet Potato Soup

1 yellow onion, diced
1 tbs coconut oil
4 medium sized sweet potatoes, roasted or baked (about 4 cups)
1 tbsp ginger, minced
½ tsp garam masala spice mix
1 can coconut milk
2 cups water

  1. Heat oil in pot. Add onion and saute for 5 minutes, until translucent.
  2. Add minced ginger and cook additional 2 minutes
  3. Rough chop the sweet potatoes (you can leave the skin on) and add to the onion and ginger. Save time by baking a bunch of sweet potatoes in the beginning of the week and using them for different meals. You can also store them in the freezer.
  4. Add the coconut milk, water and garam masala*. Bring to a simmer, then lower heat.
  5. Cook for ten minutes on medium low heat.
  6. Blend the soup and adjust seasoning.

*garam masala is an Indian spice mix and happens to be one of my favorites. It usually has a mix of black pepper, cumin, coriander, cinnamon and clove. Every mix of garam masala is different, which makes it kinda exciting! Feel free to omit if you can’t find it, or just add a spice you like.