Category Archives: Uncategorized

Seasonal Eats

Picture

Have you noticed that when you’re shopping at the grocery store (which most of us are), you can get any fruit or vegetable all year round? It’s kinda awesome to be able to eat avocado all year round, but sometimes we don’t realize how those avocados got to NY in the middle of winter. Yesterday I was at the Union Square Farmers’ Market and a woman and her son were looking for strawberries. I explained to her that the season for strawberries had passed, but that apples and pears are in abundance! I started thinking about how few of us really know what grows locally and how for granted we take our 24/7 access to all fruits and veggies.

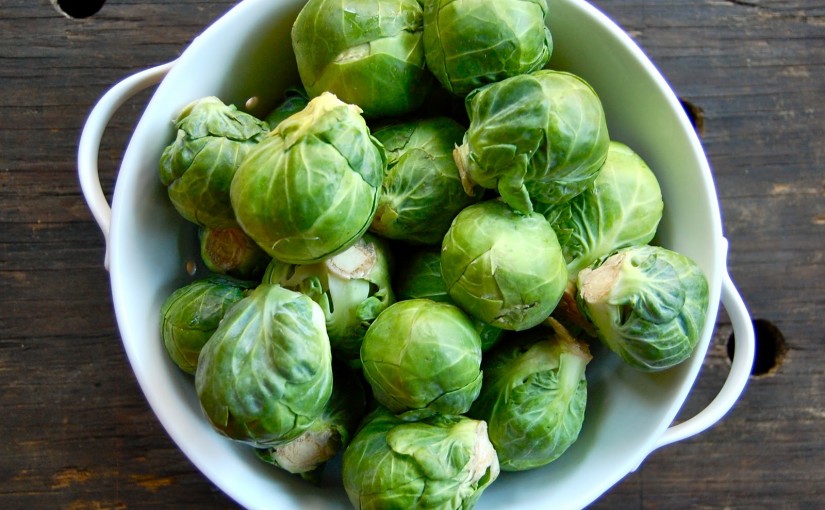
In NY, we have very dynamic seasons. This means that different produce grows at different times, depending on the weather. In the summer we get beautiful berries and stone fruit, and in the fall we have all types of squash, broccoli, cauliflower, Brussels sprouts, apples, pears and sweet potato at the market. Some veggies like kale tend to grow year round (woohoo!). These are some photos of local fall produce here in NYC. We have kohlrabi, peppers, romanesco (it’s a variety of broccoli), pears, pumpkin, Brussel sprouts and squash.

So, why eat in season? Do you ever notice that the foods you crave are different depending on the weather? Our body is always looking to be in a state of balance. If it’s cold out, our bodies often want more warming and heavier foods. It’s kinda like we are preparing for hibernation in the winter. After all, we are animals, too. And in the summer, we want light foods that are less cooked and help keep us cool. If we eat the foods that grow naturally in our region, we will naturally follow this pattern since plants also grow according to the weather.

Eating in season is just one dietary theory and it’s not for everyone. But I find that I feel more in harmony with the earth and connected to my environment when I eat in season. Other benefits of eating in season include:

1.       It’s a great way to support small local farmers.

2.       Local produce is more nutritious because it was harvested more recently.

3.       It’s better for the environment – most produce in the grocery stores travels by boat, plane or long distances in trucks to get to our grocery stores. When you buy local produce, the farm is usually within 150 miles.

4.       Local produce can be less expensive since the shipping and fuel costs are way less.

Here are 3 steps you can take to eat in season:

1.       Stop by your local farmers’ market.

2.       Look for signs that say “local” in your grocery store.

3.       Check out either of these handy guides to see what is in season in your area.

Seasonal Recipe: Brussels Sprouts with Apples

Picture

As some of you may know, I’ve been working at the Farmers’ Markets for the past 5 months doing cooking demonstrations with local and seasonal produce. I love my job. It’s amazing to be able to show people simple and healthy recipes they can make at home while also supporting local farmers. One of the unanticipated benefits to me has been that I have gained a much deeper and experiential knowledge of what foods are in season.

In NY, Brussels sprouts and apples are at their peak. And, I’ve gotta say, I just love the Brussels sprouts stalks. They look like little palm trees! If you haven’t seen them before, here’s a not so great picture, but it gives you an idea.

In addition to being beautiful, Brussels sprouts are full of health promoting antioxidants. They are also high in fiber (4 grams per cup!) and anti-inflammatory. And just in case you need another reason to start integrating them into your diet, they are also delicious. This recipe is perfect for the upcoming holidays. And if your friends and family don’t like them, you can blame me.


Brussels Sprouts with Apples and Onions
Recipe from the JSY to Fruits and Vegetables Curriculum

Ingredients:

  • 1 tablespoon oil
  • 1 cup diced onion
  • 4 cups sliced Brussels sprouts
  • 2 cups diced apple
  • 2 tablespoons lemon juice
  • Salt and pepper to taste

Directions:

1. Heat oil in a large pan over  medium heat.
2. Add onion. Cook for 5 minutes, until soft.
3. Add Brussels sprouts and cook 5  minutes.
4. Add the apple and cook 5-10 minutes, or until apples are soft.
5. Remove from heat. Add lemon juice, pepper and salt. Mix well.
6. Serve hot and enjoy!

Veggie Burgers, oh me oh my!

Recently, a friend of mine posted a photo of a veggie burger she had made on facebook. I checked out the recipe and I felt, well, insanely jealous and inspired! I haven’t had a veggie burger since going on a candida diet around 4 years ago, and I miss it! Store bought brands are completely out due to the preservatives, processed soy, gluten and sugar (I know.. it’s in everything).

I stated doing my research last night, and wow, it was so much fun to see how many different ways you can make a veggie burger! Here are some of my favorites from the search:

The quinoa zucchini burger from Food52, which I mention above.
The ultimate veggie burger from 101cookbooks.
Adrianna‘s irresistible veggie burger.
And, Oh She Glows, veggie burger.

Now, for those of you who know me, you may know that I’m not much of a recipe follower, but that I prefer to get inspiration from recipes. So, I decided to make a combination of the lot. I also wanted to use eggs, rather than the flax meal egg substitute, but if you are vegan, please do feel free to skip the eggs.

Admittedly, I got a little over excited about the eggs and used 2, which made the batter a little too wet. The bonus was that I got to squeeze out the excess liquid from the batter, which I cooked into a delicious version of scrambled eggs! Who knew! I also ended up adding almond meal to the batter to help dry it out – that stuff is so versatile!

Additional note: I tried to fry the patties in some olive oil, and they fell apart (still delicious!), so I baked them and then sauteed them. Feel free to bake and eat as is, or bake and then saute.

Here’s the recipe, hope you enjoy!

Samantha’s Veggie Burgers

1 zucchini, grated
1 carrot, grated
1/2 red onion, diced (or minced in food processor)
1/2 yellow onion,
2 stalks of celery, sliced thin
1/3 cup pumpkin seeds (I used roasted, you can use raw)
1/4 cup sunflower seeds
3/4 cups cooked quinoa
1/2 cup black beans
3 cloves roasted garlic
2 eggs (this is how I made it, but I would use 1 eggs next time, or 2 small eggs)
1/2 cup cilantro (rough chop)
3 sprigs of thyme
a dash of cayenne
2 tsp cumin
1 tsp coriander
salt and pepper to taste
1/2 tbs lemon juice
1/4 cup almond meal (this was a quick fix for the excess liquid, only use as needed)

Instructions:
1. Cook quinoa  (you can do this the night before)
2. Preheat oven to 350 degrees
3. Grate the zucchini and carrot, put it in a large bowl
4. Dice the onions and celery (or mince them in a food processor)
5. Saute the onions and celery in olive oil until translucent. Add the cumin, coriander, cayenne, salt and pepper
6. Put the garlic, pumpkin seeds and sesame seeds in the food processor and pulse until broken up (but not dust). Do the same (separately) with the quinoa and black beans  (make sure you rinse them first if you are using canned). You want a little texture, but you also want it to stick together.
7. Mix onions, celery, quinoa, black beans, sunflower seeds, pumpkin seeds, zucchini, carrot, fresh herbs, and lemon juice in a bowl. Taste it and adjust the seasoning as you see fit.
8. Whisk together your eggs or flax eggs and pour the egg mixture into the rest of the ingredients and mix well.
9. Start forming patties by pressing a ball of the ingredients into your hand. If it’s too wet, you can squeeze out some of the liquid and/or add some almond meal to the batter (or flour if you can eat gluten).
10. Put the patties on a baking sheet and make for 20 minutes on each side (40 min total).

Once the patties are cooked, you can eat them as is or you can saute them in some olive oil for a crisper feel.


About to go in the oven…
Finished product (still working on the food photography). Added some sunflower seed puree with mustard powder and tahini for dipping. The burger that looks a little darker was sauteed in olive oil after baking.
Finished product number two, potentially better lighting 🙂